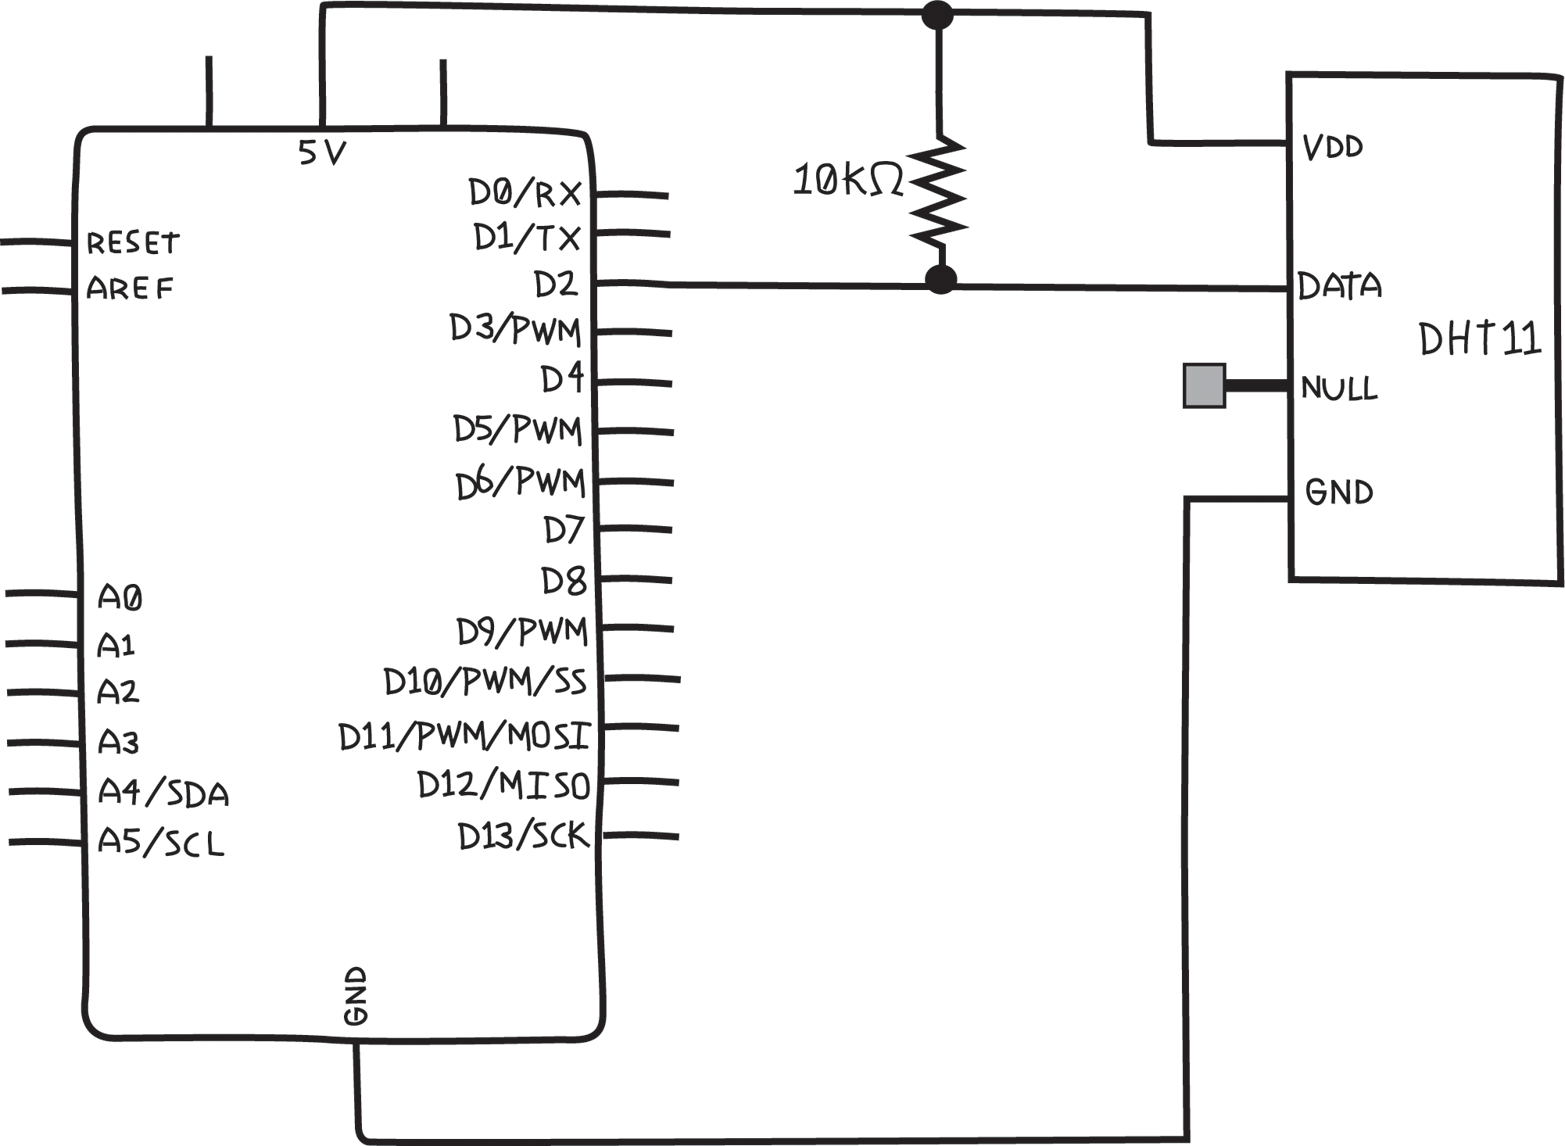
The DHT11 is a popular Temperature and Humidity Sensor. Like the RTC, it is inexpensive and easy to use with Arduino. According to the data sheet, the DHT11 is connected as shown in Figure 8-13. Note the pullup resistor on the data pin.

Because we’re adding a component that needs one, let’s add another 10K ohm resistor to our shopping list. We’re now at version 0.4:
- Add one resistor, 10K ohm (for Temperature and Humidity Sensor)
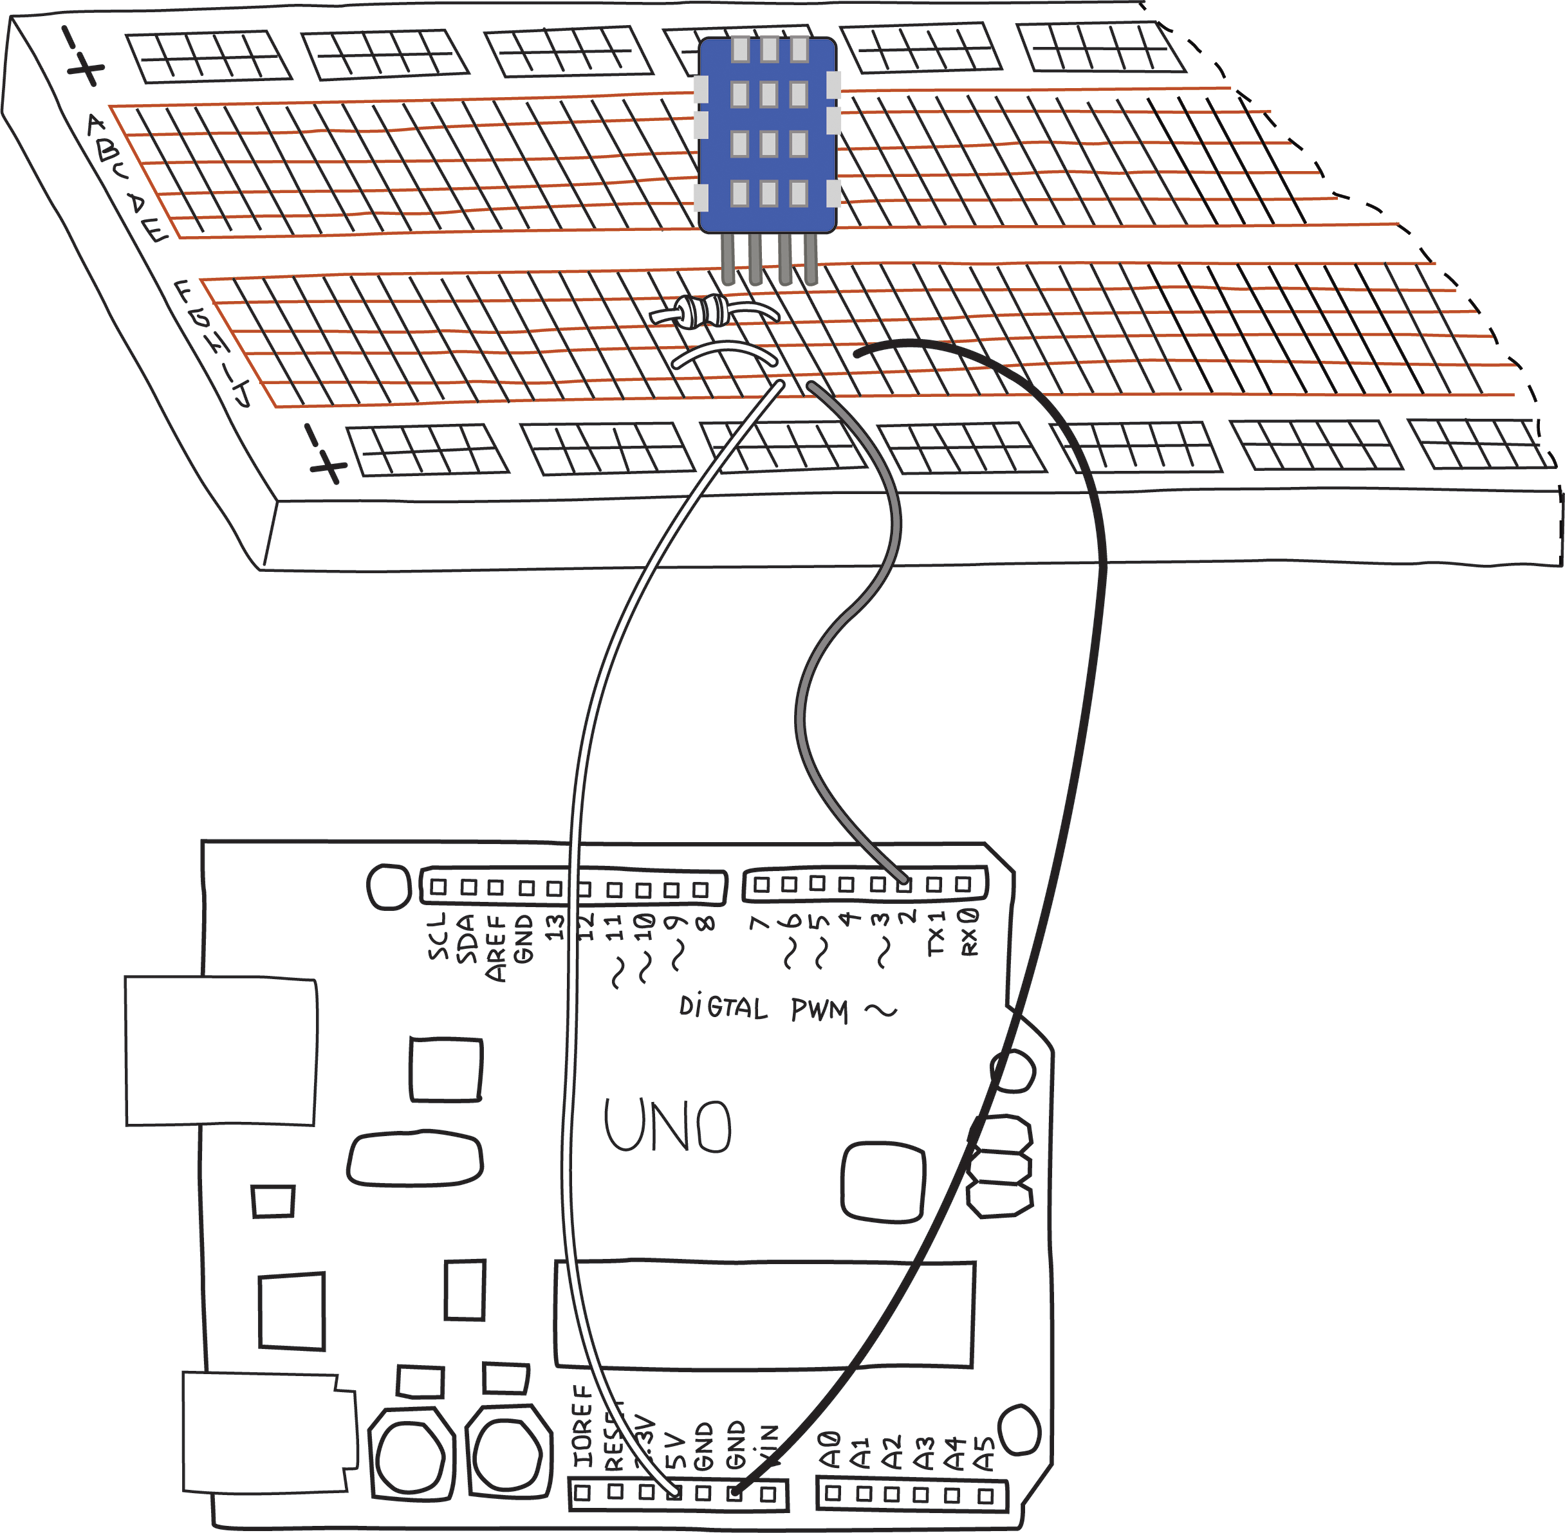
Because of the pull-up resistor, we can’t use the trick we did with the RTC (snapping it directly onto the Arduino), so we’ll have to put this on a breadboard (Figure 8-14).
TIP
The schematic diagram of a circuit is the same regardless of whether you build the circuit on a breadboard or in some other way.

You can install the Adafruit DHT11 library exactly as you did the RTClib library.
Check that you’ve properly installed the library by opening the DHTtester example in the DHT category of examples, and then click the Verify button (see Figure 4-2). If you get the message “Done compiling”, you have installed the library correctly.
Before you upload the sketch to your Arduino, note that the example supports three different models of DHT sensors: DHT11, DHT21, and DHT22. To correctly select the proper model, a constant named DHTTYPE is defined to be either DHT11, DHT21, or DHT22:
// Uncomment whatever type you're using!
//#define DHTTYPE DHT11   // DHT 11
#define DHTTYPE DHT22   // DHT 22  (AM2302)
//#define DHTTYPE DHT21   // DHT 21 (AM2301)
Notice that DHT11 and DHT21 are ignored, because those two lines are comments or, as programmers say, those lines are commented out. Because you are using a DHT11 sensor, you need to comment out the line with the DHT22, and “uncomment” the line with the DHT11:
// Uncomment whatever type you're using!
#define DHTTYPE DHT11   // DHT 11
//#define DHTTYPE DHT22   // DHT 22  (AM2302)
//#define DHTTYPE DHT21   // DHT 21 (AM2301)
The lines with the DHT22 and the DHT21 aren’t doing anything, but they serve to remind us that the library will work with these three sensors, and that this is how you specify which one you are using.
NOTE
You may have encountered another type of constant: the constant variable. Apart from the awkward name, it too is important and useful.
The differences between a variable (like an integer), a constant variable, and a named constant value are subtle and a bit complicated. In broad terms, a constant variable uses a tiny bit of your Arduino’s memory and obeys scope rules. In contrast, a named constant value does not use any memory and always has global scope.
As a general rule, you should avoid using named constant values and use them only if a library requires them.
You can learn more about named constant values, the const keyword, and variable scope on the Arduino website.
Once you have defined the correct type of DHT sensor, verify that the sketch uses the same pin that you have connected to the sensor, and upload the DHTtester example to your Arduino and open the serial monitor. You should see something like this:
DHTxx test!
Humidity: 47.00 % Temperature: 24.00 *C 75.20 *F Heat index: 77.70 *F
Humidity: 48.00 % Temperature: 24.00 *C 75.20 *F Heat index: 77.71 *F
You can check the humidity sensor by gently exhaling on it. The moisture in your breath should make the humidity rise. You can try to raise the temperature by placing your fingers around the sensor, but since you’re touching the plastic case and not the sensor itself, you may not be able to raise the temperature by much.
Now that you can feel confident in your components, you can start designing the software.
Leave a Reply