It’s time to upload the sketch for the LCD News Reader to the Arduino. Here are the steps you’ll need to follow:
- Attach the Arduino to your computer using a USB cable.
- Open the Arduino software and type Example 14-1 into the software’s text editor.
- Upload the sketch to the Arduino.
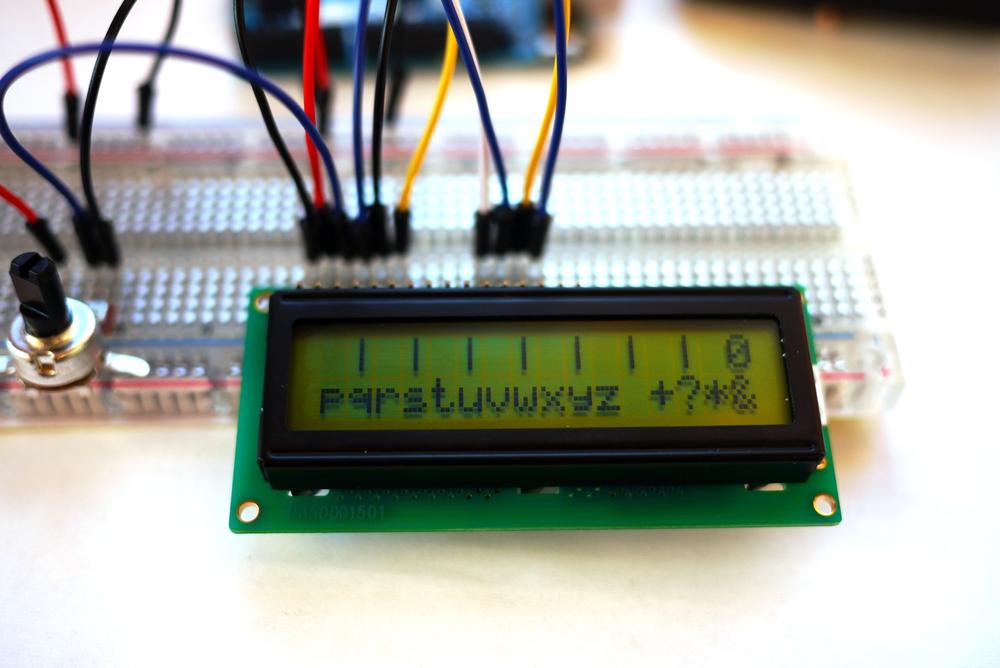
Once the LCD News Reader sketch has been uploaded to the Arduino, the LCD will display a message, as shown in Figure 14-1. According to computing tradition, the first message you should display on a new piece of hardware is “Hello, World!” Figure 14-6 shows the LCD News Reader displaying various screens.

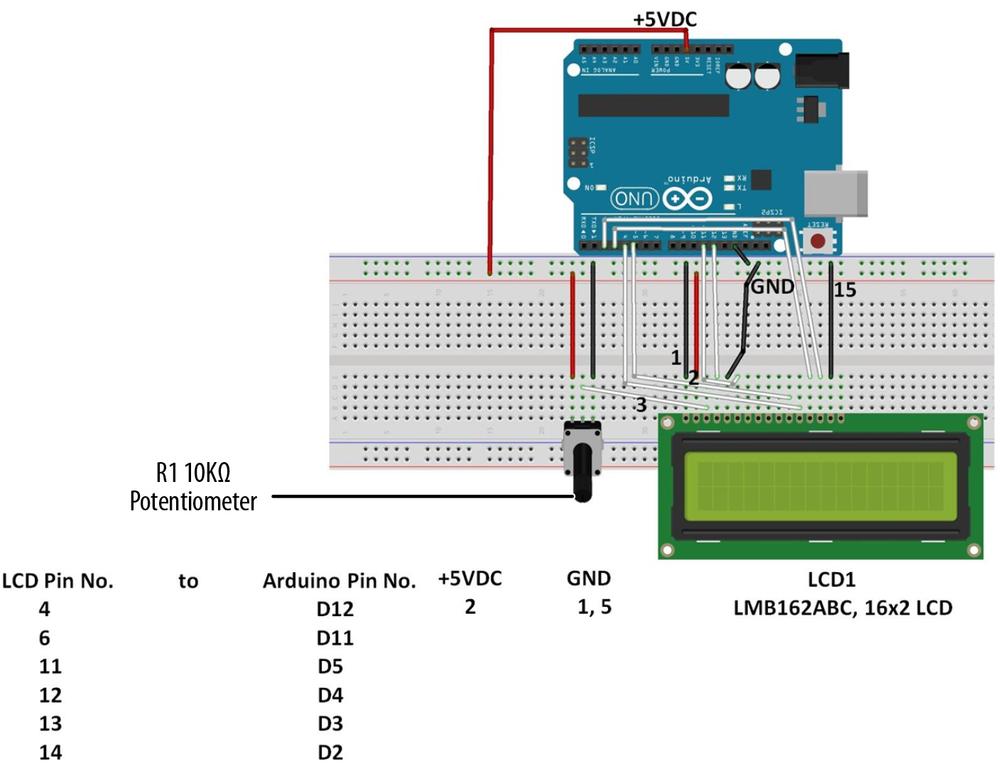
Figure 14-5. The LCD News Reader Fritzing diagram
Example 14-1. The LCD News Reader sketch
/*
  The LCD News Reader

  20 August 2013

 */

// include the LCD library code:
#include <LiquidCrystal.h>

// set up pins on Arduino for LCD and test lead
LiquidCrystal lcd(12,11,5,4,3,2);


// set up the LCD's number of columns and rows

#define Xdelay 1900

String a;
String b;
String c;
String d;


void setup() {
  lcd.begin(16,2);
  lcd.setCursor(0,0);


  clearLCD();
  backlightOn();

  lcd.print("HELLO, WORLD!");
  delay(Xdelay);

}


void loop()
{

  char databuff[16];
  char dispbuff[16];

  // display on/off test
  for(int x = 5; x>0; x--)
     {
     delay(1000);
     displayOff();
     delay(1000);
     displayOn();
     }


  clearLCD();
  backlightOn();
  lcd.print("SLOW FADE       ");
  fadeOut(100);
  fadeIn(10);

  // light up all segments as a test


  lcd.print("0123456789abcdef");
  delay(Xdelay);
  lcd.print("ghijklmnopqrstuv");
  delay(Xdelay);
  lcd.print("wxyz +?*&%$#()!=");
  delay(Xdelay);
  lcd.print("                ");
  delay(Xdelay);
  lcd.print("                ");
  delay(Xdelay);

  a = "0123456789abcdef";
  b = "ghijklmnopqrstuv";
  c = "wxyz +?*&%$#()!=";
  d = "                ";

  selectLineTwo();
  lcd.print(a);
  delay(Xdelay);

  selectLineOne();
  lcd.print(a);
  selectLineTwo();
  lcd.print(b);
  delay(Xdelay);

  selectLineOne();
  lcd.print(b);
  selectLineTwo();
  lcd.print(c);
  delay(Xdelay);

  selectLineOne();
  lcd.print(c);
  selectLineTwo();
  lcd.print(d);
  delay(Xdelay);

  selectLineOne();
  lcd.print(d);
  selectLineTwo();
  lcd.print(d);
  delay(Xdelay);


  for (int x = 0; x<=5; x++)
    {
    for(int i = 15; i>=0; i--)
      {
       goTo(i);
       if (i%4 == 1)
         lcd.print("- ");
       if (i%4 == 2)
         lcd.print("I ");
       if (i%4 == 3)
         lcd.print("- ");
       if (i%4 == 0)
         lcd.print("I ");
       delay(100);
      }
    for(int i =0; i<=14; i++)
      {
       goTo(i);
       lcd.print(" @");
       delay(100);
      }
    }

  clearLCD();
}

void selectLineOne()
{
   lcd.write(0xFE);   //command flag
   lcd.write(128);    //position
   delay(10);
}
void selectLineTwo()
{
   lcd.write(0xFE);   //command flag
   lcd.write(192);    //position
   delay(10);
}
void goTo(int position)
{
if (position<16)
  {
    lcd.write(0xFE);   //command flag
    lcd.write((position+128));    //position
  }else if (position<32)
    {
     lcd.write(0xFE);   //command flag
     lcd.write((position+48+128));    //position
} else { goTo(0); }
   delay(10);
}

void clearLCD()
{
   lcd.write(0xFE);   //command flag
   lcd.write(0x01);   //clear command
   delay(10);
}
void backlightOn()
{
    lcd.write(0x7C);   //command flag for backlight stuff
    lcd.write(157);    //light level
   delay(10);
}
void backlightOff()
{
    lcd.write(0x7C);   //command flag for backlight stuff
    lcd.write(128);    //light level for off
   delay(10);
}

void backlightValue(int bv)
{
    int val = bv;
    if (bv < 128) val= map(bv, 0, 1023, 128, 157);
    if (bv > 157) val = map(bv, 0, 1023, 128, 157);

    lcd.write(0x7C);   //command flag for backlight stuff
    lcd.write(val);    //light level
   delay(10);
}


void displayOn()
{
   lcd.write(0xFE);   //command flag
   lcd.write(0x0C);   //clear command
   delay(10);
}

void displayOff()
{
   lcd.write(0xFE);   //command flag
   lcd.write(0x08);   //clear command
   delay(10);
}

void fadeOut(int fade)
{
  for (int x = 157; x>128; x--)
  {
    backlightValue(x);
    delay(fade);
  }
}

void fadeIn(int fade)
{
  for (int x = 128; x<=157; x++)
  {
    backlightValue(x);
    delay(fade);
  }
}
Figure 14-6. The LCD News Reader displaying various screens
TECH NOTE
A 16×2 LCD has two rows capable of displaying 16 characters each.
Leave a Reply