It’s time to upload the sketch to the Arduino with the Theremin’s photocell and simple transistor amplifier circuits built on the MakerShield. Example 12-1 operates the Arduino-based Theremin using a photocell and a simple transistor amplifier circuit. Here are the steps you’ll need to follow:
- Attach the Arduino to your computer using a USB cable.
- Open the Arduino software and type Example 12-1 into the software’s text editor.
- Upload the sketch to the Arduino.
Once the Theremin sketch has been uploaded to the Arduino, the mini 8Ω speaker will begin emitting an electronic buzzing sound. A wave of your hand over the photocell will change the tone coming from the speaker. With a small amount of light on the photocell, the tone’s pitch will decrease. Placing the Theremin under a light bulb increases the electronic sound’s pitch. Like the inventor Leon Theremin, now you’re ready to create some really cool sounds from your Arduino-powered Theremin. Remember to document your new designs and experiments in a lab notebook!
Example 12-1. The Theremin sketch
/*
  Theremin

  Plays sound effects through a simple transistor
  amplifier using a photocell.

  I/O circuits:
   * A simple transistor amplifier wired to digital pin 8
   * A photocell wired to analog 0 and +5V
   * A 10K resistor wired to analog 0 pin to ground

*/


void setup() {
  // initialize serial communications (for debugging only):
  Serial.begin(9600);
}

void loop() {
  // read the sensor:
  int sensorReading = analogRead(A0);
  // print the sensor reading so you know its range:
  Serial.println(sensorReading);

  // map the analog input range (in this case, 400–1000 from
  // the photoresistor) to the output pitch range (120–1500 Hz)
  // change the minimum and maximum input numbers below
  // depending on the range your sensor's giving:
  int thisPitch = map(sensorReading, 400, 1000, 120, 1500);

  // play the pitch:
  tone(9, thisPitch, 10);
  delay(1);        // delay in between reads for stability
}
TROUBLESHOOTING TIP
If the mini 8Ω speaker doesn’t emit sound, check your sketch for programming errors and also check the orientation of the transistor and the electrolytic capacitor on the MakerShield mini breadboard.
THE SERIAL MONITOR
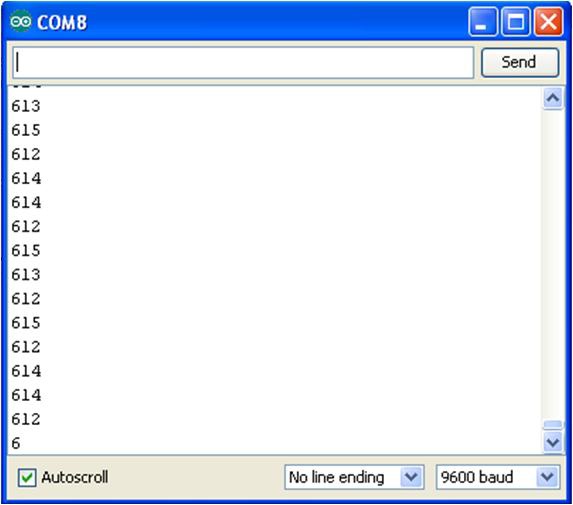
Sometimes you may have to debug or troubleshoot a sketch because of programming errors. The Serial Monitor is an embedded tool of the Arduino software that allows you to display information from your program, such as data variables, on your computer screen. To display the data, use the simple Arduino instruction Serial.println(). The Theremin sketch uses this to display the photocell sensor data. As shown in Figure 12-4, the sketch instruction provides scrolling sensor data from the photocell to the Serial Monitor.
To access the data monitor, add the Serial.begin(9600) instruction within the void setup() function to open a communication link between your computer and the Arduino. The 9600 sets the speed at which the Arduino sends data to your computer. It means your Arduino is sending data to your computer at 9,600 bits every second. (Another term used to describe the data transmission speed is “Baud” rate.)
To display variables on the Serial Monitor, use the instruction Serial.print In(variable name).

Figure 12-4. Photocell sensor data scrolling on the Serial Monitor
Leave a Reply